DIY vs. Professional Treadmill Belt Installation: Which Should You Choose?
Share
When your treadmill belt starts showing signs of wear, you're faced with an important decision: should you tackle the replacement yourself or hire a professional? This comprehensive guide will help you make the right choice based on your skills, budget, and specific situation.
Understanding Treadmill Belt Installation
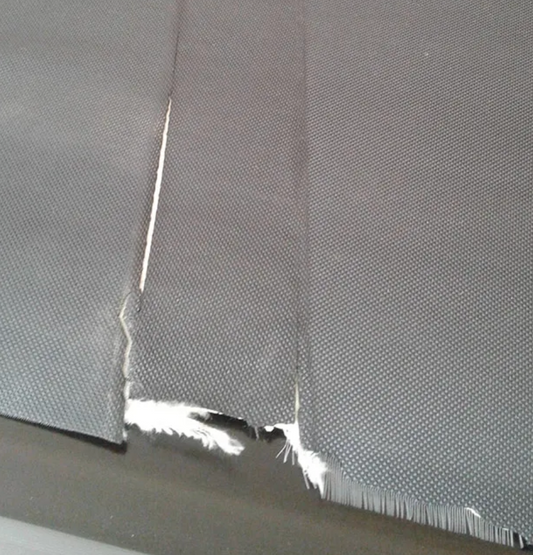
Treadmill belt installation involves removing the old belt and installing a new one, which requires adjusting tension, alignment, and ensuring proper tracking. While it might seem straightforward, several factors can complicate the process.
DIY Treadmill Belt Installation
Advantages of DIY Installation
Cost Savings The most obvious benefit is money saved on labor costs. Professional installation can range from $150-$400, depending on your location and the complexity of your treadmill model. By doing it yourself, you only pay for the replacement belt.
Convenience and Timing You can work on your own schedule without waiting for appointment availability. No need to coordinate with service technicians or work around their busy schedules.
Learning Experience Understanding your treadmill's mechanics helps with future maintenance and troubleshooting. You'll gain valuable knowledge about how your equipment works.
Immediate Satisfaction There's a sense of accomplishment that comes with successfully completing a repair project yourself.
Disadvantages of DIY Installation
Risk of Damage Improper installation can damage your treadmill's motor, deck, or other components. Mistakes can be costly and may void your warranty.
Time Investment First-time installations can take 3-6 hours, especially if you encounter unexpected challenges or need to research solutions.
Tool Requirements You'll need specific tools including Allen wrenches, screwdrivers, and possibly specialized equipment depending on your treadmill model.
Safety Concerns Working with electrical components and heavy machinery poses potential safety risks if proper precautions aren't taken.
DIY Installation Requirements
Skill Level Needed
- Basic mechanical aptitude
- Ability to follow detailed instructions
- Patience for troubleshooting
- Physical strength to lift and maneuver components
Essential Tools
- Complete Allen wrench set
- Phillips and flathead screwdrivers
- Socket wrench set
- Flashlight or work light
- Measuring tape
- Lubricant (if required)
Time Commitment
- First installation: 4-6 hours
- Experienced DIYers: 2-3 hours
- Additional time for research and preparation
Professional Treadmill Belt Installation
Advantages of Professional Installation
Expertise and Experience Professional technicians have installed hundreds of belts and can quickly identify and solve problems that might stump a DIYer.
Warranty Protection Many manufacturers require professional installation to maintain warranty coverage. Professional work often comes with its own service guarantee.
Proper Tools and Equipment Technicians have specialized tools that make the job easier and ensure proper installation.
Time Efficiency Professionals can typically complete the installation in 1-2 hours, getting your treadmill back in service quickly.
Safety Assurance Trained technicians understand safety protocols and can identify potential hazards you might miss.
Disadvantages of Professional Installation
Higher Cost Labor costs can add $150-$400 to your total expense, depending on your location and service provider.
Scheduling Constraints You'll need to work around the technician's availability, which might mean waiting days or weeks for service.
Limited Learning You won't gain the knowledge that comes with hands-on experience.
Potential for Upselling Some service providers might recommend additional services or parts you don't actually need.
Cost Comparison Analysis
DIY Costs
- Replacement belt: $50-$200
- Tools (if needed): $30-$100
- Total: $80-$300
Professional Installation Costs
- Replacement belt: $50-$200
- Labor: $150-$400
- Total: $200-$600
Long-term Considerations
If you plan to maintain your treadmill long-term, the initial tool investment for DIY pays off over multiple maintenance cycles.
When to Choose DIY Installation
You Should Go DIY If:
- You have basic mechanical skills
- Your treadmill is out of warranty
- You enjoy hands-on projects
- You have 4-6 hours available
- You want to save money
- Your treadmill model has good online support/videos
Best Candidates for DIY:
- Homeowners with workshop experience
- People who've successfully completed similar projects
- Those with patient, methodical personalities
- Budget-conscious consumers
When to Choose Professional Installation
You Should Hire a Professional If:
- Your treadmill is under warranty
- You lack mechanical experience
- You don't have the necessary tools
- Time is a critical factor
- Your treadmill is a complex commercial model
- You're uncomfortable with electrical components
Best Candidates for Professional Service:
- Busy professionals with limited time
- Those who prefer guaranteed results
- Owners of high-end or commercial treadmills
- People who've had bad DIY experiences
Step-by-Step Decision Framework
1. Assess Your Skill Level
Rate yourself honestly on mechanical aptitude, tool usage, and patience for detailed work.
2. Check Your Warranty Status
If under warranty, professional installation might be required or recommended.
3. Evaluate Time Constraints
Consider both immediate availability and the time investment required.
4. Calculate Total Costs
Include tools, potential mistakes, and opportunity cost of your time.
5. Research Your Specific Model
Some treadmills are notoriously difficult while others are straightforward.
Common Mistakes to Avoid
DIY Mistakes
- Incorrect belt tension
- Poor alignment causing premature wear
- Forgetting to lubricate the deck
- Not testing thoroughly before use
- Rushing through the process
Professional Service Mistakes
- Not verifying credentials
- Accepting unnecessary upsells
- Not getting written estimates
- Failing to check warranty implications
Making the Final Decision
The choice between DIY and professional installation ultimately depends on your specific circumstances. Consider these final factors:
Choose DIY if you have the skills, time, and desire to learn, plus your treadmill is out of warranty and you want to save money.
Choose Professional if you value convenience, want guaranteed results, your treadmill is under warranty, or you lack confidence in your mechanical abilities.
Conclusion
Both DIY and professional treadmill belt installation have their merits. DIY installation offers cost savings and learning opportunities but requires time, tools, and mechanical aptitude. Professional installation provides expertise and convenience but costs more.
The key is honest self-assessment of your abilities and circumstances. There's no shame in choosing professional installation if it's the right fit for your situation. Conversely, don't let others discourage you from DIY if you have the skills and motivation.
Remember, the goal is getting your treadmill back in safe, working condition. Whether you choose the DIY route or professional installation, investing in a quality replacement belt from a reputable supplier is crucial for long-term satisfaction.
Ready to replace your treadmill belt? Browse our extensive selection of high-quality replacement belts for all major brands, complete with detailed installation guides and video tutorials to support your DIY journey.